
Refrigerator Coil Cleaning Tips: How to Clean Them & Why It Matters
In this article
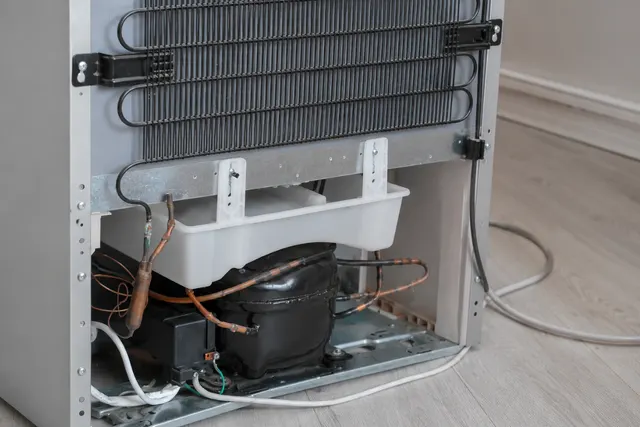
Refrigerator coils are one of the most overlooked parts of your kitchen—until they cause a problem. Tucked behind or underneath your fridge, the condenser coils quietly do the hard work of releasing heat so your food stays cold. Over time they collect dust, pet hair, and kitchen grime, and once they’re coated in debris your refrigerator has to work much harder to do the same job.
The good news is that cleaning refrigerator coils is simple, inexpensive, and one of the best things you can do to keep your appliance running efficiently. In this guide we’ll explain why coil cleaning matters, what dirty coils can do to your fridge, and exactly how to clean them the right way.
Why Cleaning Your Refrigerator Coils Matters
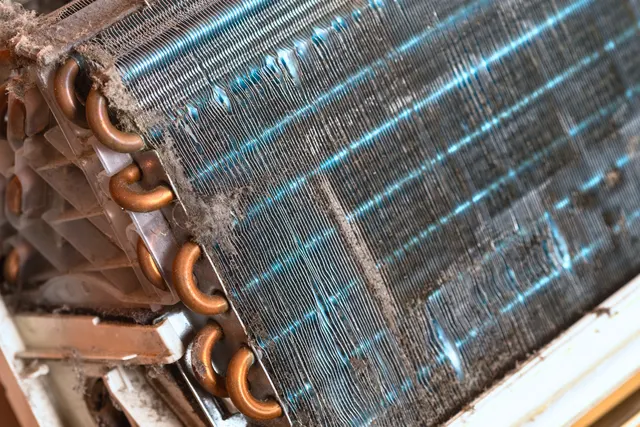
The condenser coils carry hot refrigerant from the compressor and let that heat dissipate into the surrounding air. When the coils are clean, heat escapes easily and the system reaches the right temperature with minimal effort. When they’re buried under a blanket of dust, that heat gets trapped—and the whole system suffers.
Keeping the coils clean delivers a few clear benefits:
- Lower energy bills. Dirty coils force the compressor to run longer and more often, which uses more electricity. Clean coils help your fridge run efficiently.
- Better, more consistent cooling. When heat can escape properly, your refrigerator and freezer hold their set temperatures and protect your food.
- Longer appliance lifespan. Reducing strain on the compressor and fan motor helps the most expensive components last longer.
- Fewer surprise breakdowns. Routine cleaning is one of the easiest ways to avoid an unexpected (and costly) repair.
What Dirty Coils Do to Your Refrigerator
Ignoring the coils doesn’t just waste energy—it can lead to real mechanical problems. When heat can’t escape, the entire refrigeration system runs hotter and harder than it was designed to, and that stress shows up in several ways.
Here’s what commonly happens when coils are left dirty for too long:
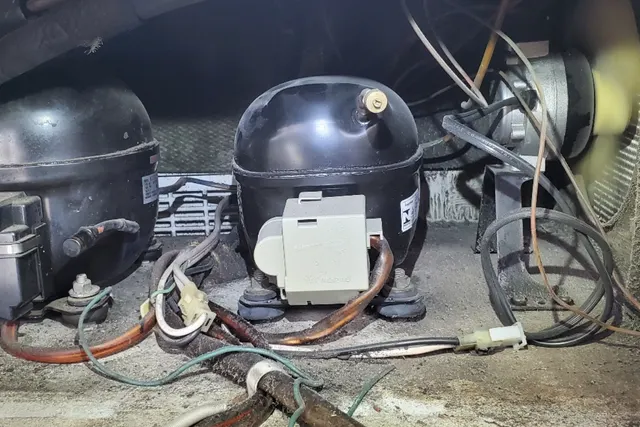
- The compressor overheats. The compressor is the heart—and the most expensive part—of your refrigerator. Trapped heat makes it run hot, and chronic overheating can shorten its life or cause it to fail outright. A compressor replacement is often costly enough that homeowners consider replacing the whole unit.
- Cooling becomes weak or uneven. If the system can’t shed heat, your fridge may struggle to stay cold, leading to spoiled food and a freezer that can’t keep up.
- The condenser fan works overtime. The fan that pulls air across the coils runs harder and longer, wearing out sooner.
- The unit runs constantly. A fridge that never seems to cycle off is often a sign that it’s fighting to release heat through clogged coils.
In short, a few minutes of cleaning can help you avoid a service call for an overheating compressor or a fridge that won’t cool. If you’re already noticing weak cooling or a unit that runs nonstop, our team of Burbank appliance repair technicians can diagnose the issue before it turns into a bigger failure.
How to Clean Refrigerator Coils: Step-by-Step
Cleaning your coils takes about 15–20 minutes and only requires a few basic tools. Here’s how to do it safely and thoroughly.
What you’ll need
- A coil cleaning brush (a long, narrow bristle brush) or a vacuum crevice tool
- A vacuum cleaner with a hose attachment
- A flashlight
- A screwdriver (only if your model has a snap-off or screwed-on base grille)
1. Unplug the refrigerator
Safety first—always disconnect power before you start. This protects you from electric shock and prevents the compressor and fan from running while you work near them.
2. Locate the coils
On most modern refrigerators, the condenser coils are on the bottom, behind a removable grille at the front kickplate or accessible from the back. On older or some built-in models, the coils may be mounted on the rear of the unit. Use your flashlight to find them—they look like a series of black tubes and thin metal fins.
3. Vacuum away the loose dust
Use the vacuum hose to remove as much loose dust, hair, and debris as you can from the coils and the surrounding area. Take your time so you don’t bend the delicate fins.
4. Brush the coils
Work the coil brush gently between and along the coils to loosen the dust that the vacuum couldn’t reach. Then vacuum again to capture everything you’ve dislodged. Repeat until the coils look clean.
5. Don’t forget the condenser fan and floor
If you can see the condenser fan near the coils, carefully clear any dust from the blades. Vacuum the floor underneath and around the fridge as well, so debris doesn’t get pulled right back in.
6. Reassemble and restore power
Replace the grille or move the refrigerator back into place, plug it back in, and confirm it powers on and begins cooling normally. That’s it—your coils are clean.
How Often Should You Clean Refrigerator Coils?
For most households, cleaning the condenser coils once or twice a year is enough to keep things running smoothly. You’ll want to clean them more frequently—roughly every three to four months—if you:
- Have pets that shed (pet hair is the number-one coil clogger)
- Live in a dusty environment or do a lot of cooking
- Keep the refrigerator in a garage, basement, or other high-debris area
Set a reminder so it doesn’t slip your mind. Pairing coil cleaning with another seasonal chore makes it easy to stay on schedule.
Let Us Handle the Maintenance for You
If you’d rather not crawl behind the fridge—or you want a professional to inspect the coils, fan, gaskets, and overall health of your appliance—we’re happy to help. Routine maintenance keeps your refrigerator efficient and catches small problems before they become expensive repairs. Learn more about our appliance maintenance services and let our factory-trained technicians keep your kitchen running cold and worry-free.